Devlog 3 - Flying Mechanic and Level Generation
Published: June 7th, 2021
After a bunch of work, I finally have a new core mechanic working in Rhythm Quest! This video showcases the flight mechanic, where you need to press and hold the jump button in order to traverse a flight path using a wing pickup.
I should take this chance to explain briefly how level design works in Rhythm Quest. Wayyy back in the infancy of Rhythm Quest development, levels were built using the Tiled map editor (https://www.mapeditor.org/). It looked something like this:
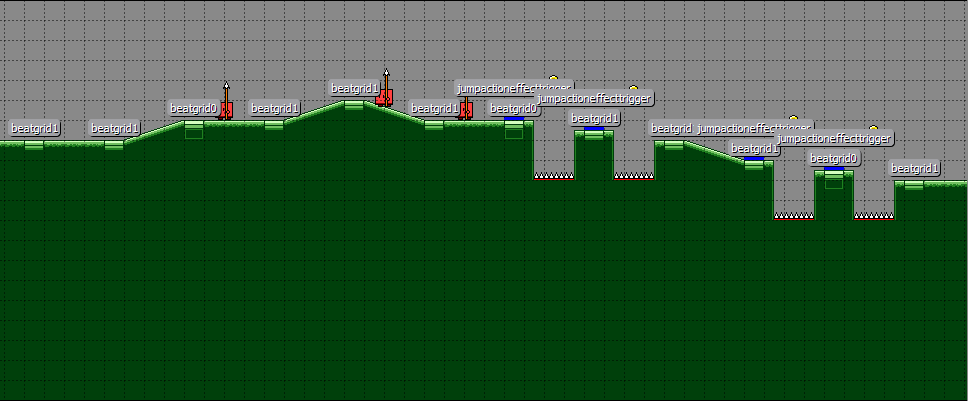
While this provided a nice visual representation of what the level looks like, it was severely limiting. The scrolling speed of the gameplay couldn't be adjusted at all, as it was locked to the tile width. In addition, it took ages to lay out all the tiles for the level, and iterating on the design was painful -- changing the ramp/height structure for one section affected the entire rest of the map, which was a mess to deal with in the editor. Every single beat marker also needed to be placed by hand. It became clear pretty quickly that this wasn't going to be workable in the long run.
Here's what a level looks like now:
"level1-1",
new LevelData() {
    PrettyName = "Level 1-1\nSunrise Sonata",
    BeatsPerChar = 1.0f,
    Obstacles =
        "#... .... ..1. ..1. ..1. ..11" +
        "#.^. ..^. ..^. ..^^" +
        "#.<< ..11 ..-- ..11" +
        "#.^1 ..^1 ..++ 1111" +
        "#+.1 .+.1 .+.+ .111" +
        "#<.1 .<.1 .111 1..." +
        "#.+. ..-. ..-. ..--" +
        "#.1. ..1. ..11 1...",
    Height = "" +
        ".... .... .... .... .... ...." +
        ".... .... .... ...." +
        ".... .... .... ...." +
        ".c.. .c.. .C.. CCBB" +
        "...c ...C .... .cC." +
        "...c ...c .ccc ...." +
        ".C.. .c.. .c.. CC.." +
        ".C.. .c.. ..Cc ....",
    Checkpoints = new []{
        new CheckpointData { Hue = 0.0f, PixelsPerBeat = 80.0f, RespawnOffset = 8.0f },
        new CheckpointData { Hue = 0.0f },
        new CheckpointData { Hue = 30.0f },
        new CheckpointData { Hue = 30.0f },
        new CheckpointData { Hue = 240.0f, PixelsPerBeat = 140.0f },
        new CheckpointData { Hue = 270.0f },
        new CheckpointData { Hue = 150.0f, PixelsPerBeat = 110.0f },
        new CheckpointData { Hue = 120.0f },
    },
    ExtraEvents = new []{
        new LevelGenerator.EventData(10.0f, LevelGenerator.EventType.AttackTutorial),
        new LevelGenerator.EventData(26.0f, LevelGenerator.EventType.JumpTutorial),
    },
}
That's right, the level is just a bunch of simple string constants! There are two main strings that are relevant here: Obstacles and Height.
Obstacles denotes the actual gameplay elements such as enemies and jumps. Each character denotes something specific, so for example the # symbol represents a checkpoint and the ^ symbol denotes a jump over a pit of spikes. 1 and 2 represent single and double hit enemies, respectively. A period (.) represents a beat with no obstacle (whitespace is ignored and is used for organization only). Each character represents 1 beat by default, but this can be changed on a per-level basis.
Height denotes the slopes/ramps going up and down over the course of the level (this is for the most part purely for visual interest and variation). This has its own separate string since it's often the case that ramps and obstacles happen at the same time.
The LevelGenerator script is responsible for taking these instructions and actually creating the entire level programmatically via instantiating and initializing various objects (prefabs). In the end, the level looks something like this in Unity's scene view:
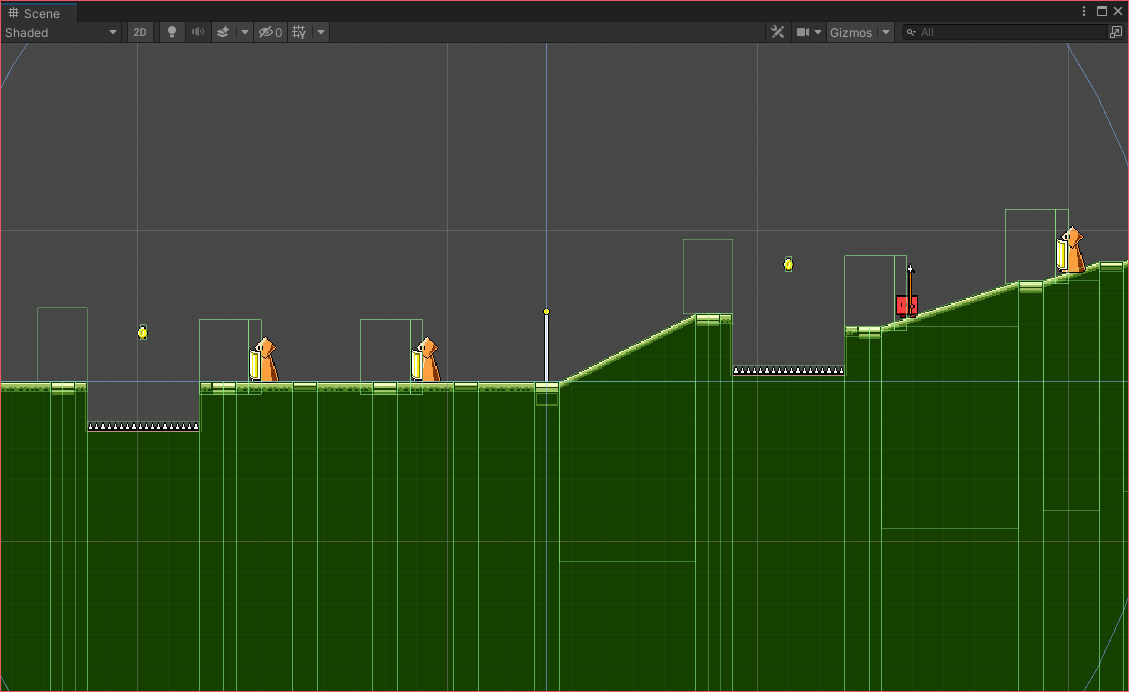
As you can see, the ground is actually made of a ton of different segments/pieces. I'm making heavy use of Unity's sprite tiling functionality here to create blocks of arbitrary width and height, so I just need to provide a set of about 9 different graphics/prefabs and then the level generator can build everything out of those.
This level generation process is one of the main things that I'll be working on over the next month or two as I strive to add additional core (and side) mechanics to the game. The flying mechanic shown earlier, for example, involved adding a bunch of code for generating the waypoints in the flight path as well as the spike segments below.
Some of my future mechanic ideas will also probably involve major refactors to this code, to support things like triplet meters, more complicated obstacle combinations, etc. While there's some additional up-front cost involved in designing out the level generation system programmatically like this, the ability to iterate and build out levels quickly more than makes up for it in the end.
<< Back: Devlog 2 - Jump Arcs
>> Next: Devlog 4 - Music/Game Synchronization