Devlog 11 - Odds and Ends
Published: August 23th, 2021
I don't have any single topic in particular to write about this time, so I'll just talk a bunch of about various minor things across the project that I ended up doing instead.
Controls tutorial
Okay, so maybe this one isn't exactly "minor", but I finally got around to adding a tutorial for the basic controls of the game. Note that for introducing new obstacles, I already provide a short interactive "tutorial" section as part of the beginning of that level:
I like how this avoids breaking the flow of the game. I'm able to piggyback a lot of understanding off of the fact that people already understand how platformers work, so it's very intuitive to jump over spike pits or to attack enemies.
However, I needed something slightly more hand-holdy in the very beginning of the game, particularly on desktop, to explain which buttons to press. Initially I was thinking of building out a separate scene for this, but I decided instead to keep in the spirit of reducing player friction and just bundled it together with the first level as a pre-level section:
Robustness
Tutorial logic can tend to be a pain in the butt to implement due to many reasons -- one of them is trying to adapt the tutorial to changing keybinds and controller inputs. Consider that all of the following are different cases that need to be handled by the tutorial system depending on what input settings have been chosen by the player:
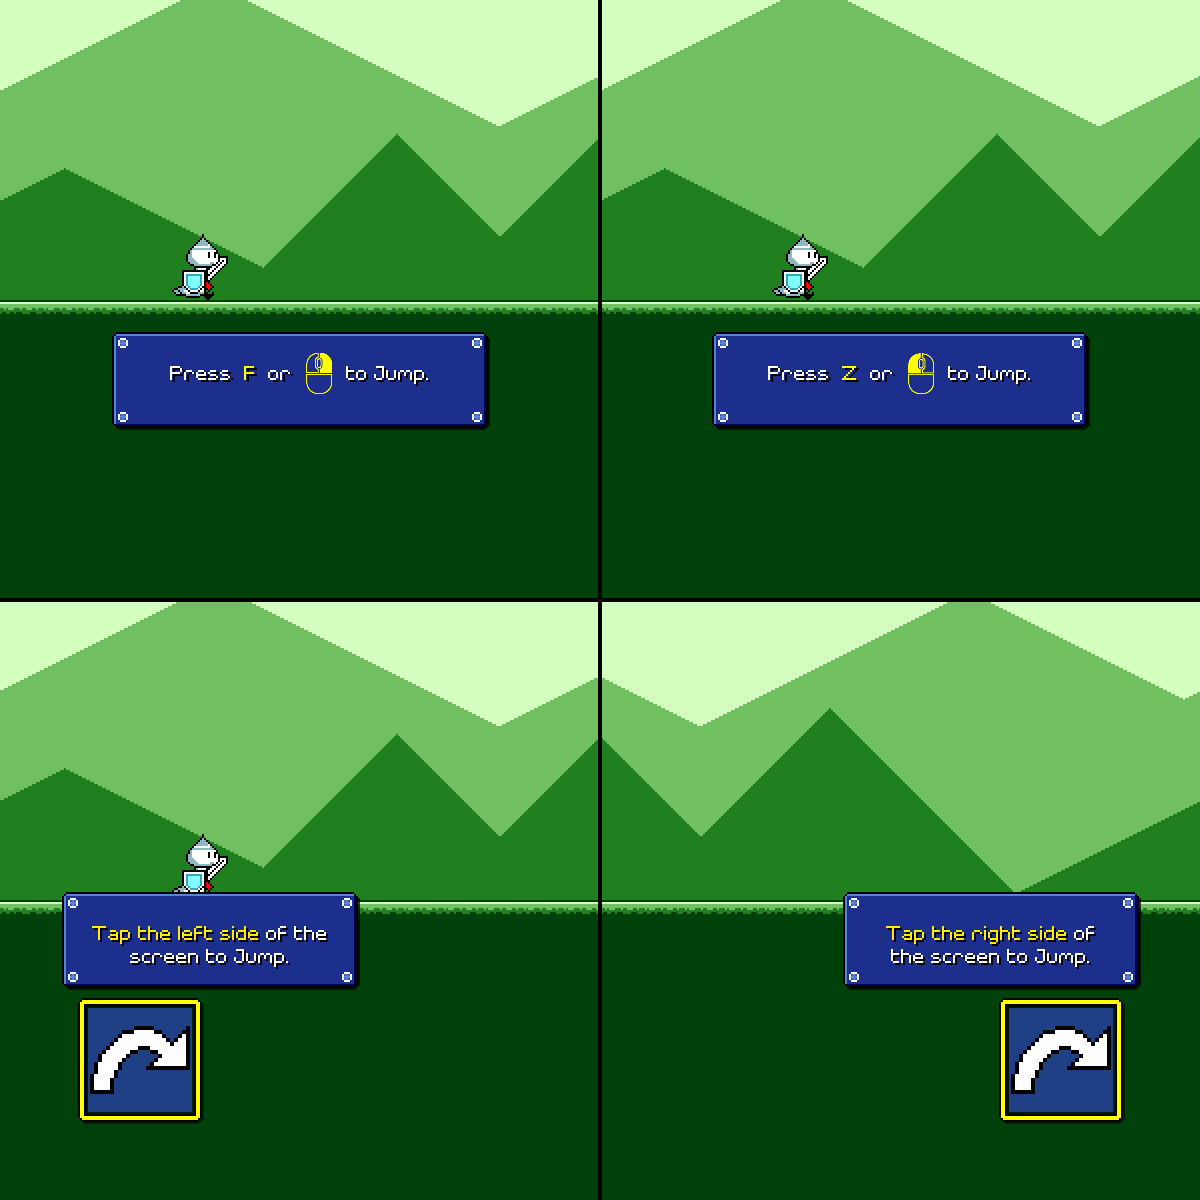
And this isn't even including gamepad support! (which I haven't added yet for the tutorial) This is one of those things that 90% of players won't even notice is implemented, and is only ever thought about when it goes wrong (so much of gamedev is like this...), but it's the right thing to do.
The messy way to handle this is by cramming all of the logic into one mega-script with a whole bunch of conditional logic, something like the following:
if (controlScheme == "Keyboard") {
    // Show keyboard tutorial #1
} else if (controlScheme == "Touch") {
    // Show touch tutorial #1
}

// Wait for player input...

if (controlScheme == "Keyboard") {
    // Hide keyboard tutorial #1
} else if (controlScheme == "Touch") {
    // Hide touch tutorial #1
}

...
That can certainly work for some cases, but I wanted something that was a little easier to extend, so I created a uniform abstracted "Tutorial" step interface, where each tutorial "step" is an abstract object that can be told to show or hide. Then, I have platform-specific child objects that are only enabled for a specific input method, and key off of the parent's "show/hide" progress in order to render themselves. Something roughly like this:
// In the main controlling script:
Tutorial1.Show();

// Wait for player input...

Tutorial1.Hide();


// In the Tutorial1 script:
public void Show() {
    // Fade our alpha value to 1.
    LeanTween.alphaCanvas(Canvas, 1.0f, 1.0f);
}


// In the child:
void Update() {
    // Key our position off of the alpha value in some way?
    _transform.anchoredPosition = Vector2.Lerp(_offset, Vector2.zero, _tutorial.Canvas.Alpha);
}
Super rough and fabricated example, but hopefully you get the idea. Of course, that's only one way to slice things. This wouldn't work as well, for example, if different platforms featured differing numbers or types of tutorial steps.
Schedules and transitions
Unlike my tutorials in Ripple Runner, the controls tutorial is interactive, which means it waits for you to actually hit the appropriate buton before proceeding to the next step. This is because I don't want to assume a certain reading speed, and because players may also (not to mention I'm eventually making this accessible for the visually-impaired) take some time to figure out where that specific key or button is.
This means that the tutorial can (in theory) go on forever. To account for this, the background music loops (pretty obvious), but there's also another layer of smoke and mirrors going on as well: underneath the hood, the player actually has a fixed x-coordinate!
I did this because I didn't want to deal with having a (potentially) infinite horizontal landscape. Instead, the player and camera actually both stay still and the only thing that happens is that the background and ground layers scroll as if you were moving. I did this by hacking the music timing script to always return a time of 0 during the tutorial, which fixes the x position at 0. I had to make one or two other adjustments to deal with the jump and attack logic (your y-position while jumping is based on a time difference, which doesn't work if music time is always 0), but it ended up working out.
The last thing I needed to deal with was sort of a headache -- I needed some way to transition seamlessly from these fake-scrolling backgrounds to the actual start of the level (where the camera and player actually track each other). The backgrounds can scroll by an arbitrary amount over the course of the tutorial, so I needed some math to offset the real main level backgrounds to match with the fake-scrolling ones. Then I just fade away all of the fake tutorial-only backdrops, and you drop straight into the level proper:
More jump arc adjustments
I already wrote in a previous devlog how I adjusted the vertical arc of jumps to match with varying ground heights. Something new that I recently discovered (while playing on a miscalibrated setup) was that mistimed jumps can still compound in a different way. This is because each jump is always designed to last 1 beat, even if the jump was timed early or late:
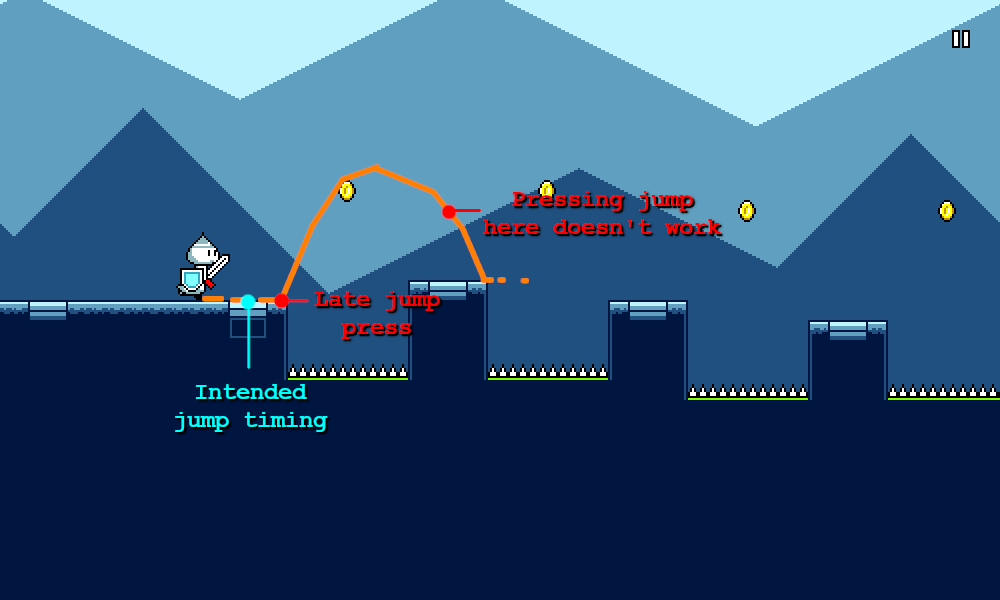
In other words, if you time jump #1 late, then trying to time jump #2 perfectly might not work, because you may not have landed from jump #1 yet. I already provide a facility for "early jumps" where you can re-jump slightly before reaching the ground, but this wasn't quite good enough.
I realized that what I really needed here was to correct for the mistimed jump by making the jump duration shorter or longer, so that you'd always land on the "intended" beat:
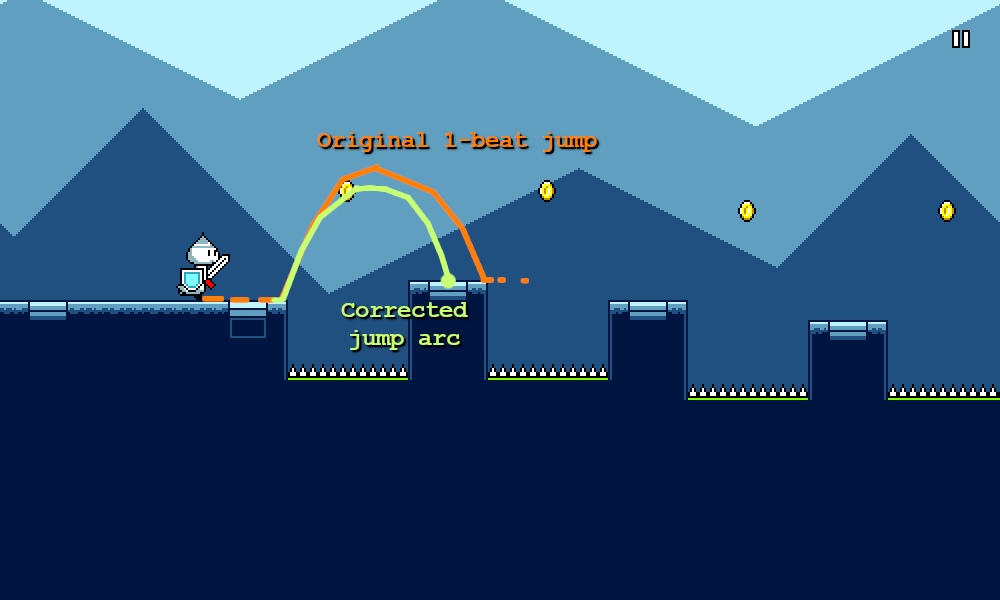
I of course only wanted to do this auto-correction for jumps that are actually intended (if you randomly bunny-hop around on off-beats, that doesn't need to be snapped to be on beat!). This wasn't too hard as I already had triggers set up for recognizing the "intended jumps" for the purpose of initiating the blue+purple visual effects. Correcting the jump length by the full amount seemed a bit unnatural, so for now I'm only correcting it by 50% (averaging it out).
Timing leniencies
Something that took me a long time to understand about game design is that challenge is not always a necessary component of enjoyment. This is probably an artifact of myself in general preferring to play games for their challenge factor, as well as growing up in an era of gaming for which enjoyment through challenge was the norm.
Rhythm Quest is not a competitive game and as such it does not feature any concept of timing judgments (Perfect / Good / Bad) or high scores. Those would be easy enough to implement, but in the end this would detract from what I'm envisioning the core experience of the game to be -- a more tactile and synesthetic sense of enjoyment.
Going along with this sentiment, I decided to make the timing windows for obstacles a bit more lenient across the board. This does of course make the game "easier" in some regard, but the particular aspect of challenge that it removes -- that of being precise within a fraction of a second -- isn't something that I feel is important to the identity of the game. Removing this allows for me to help the player enjoy the game for what it is and remove "feel bad" experiences, as well as allow for more leeway in case of an inaccurate or skipped latency calibration. It allows the gameplay to focus on the actual intended challenge, which is reading the obstacles and pressing the buttons to the correct general rhythms.
Automatic UI navigation linking
Unity tries to help you out as you build a UI system, by providing an option for automatic navigation wiring between selectable elements. This means (thankfully) you don't have to manually handle what happens when left/down/up/right are pressed in the case of every single button in every menu. Unity will simply figure out which other selectable element is present in that direction and link the navigation to that automatically.
Unfortunately, this doesn't always work well:
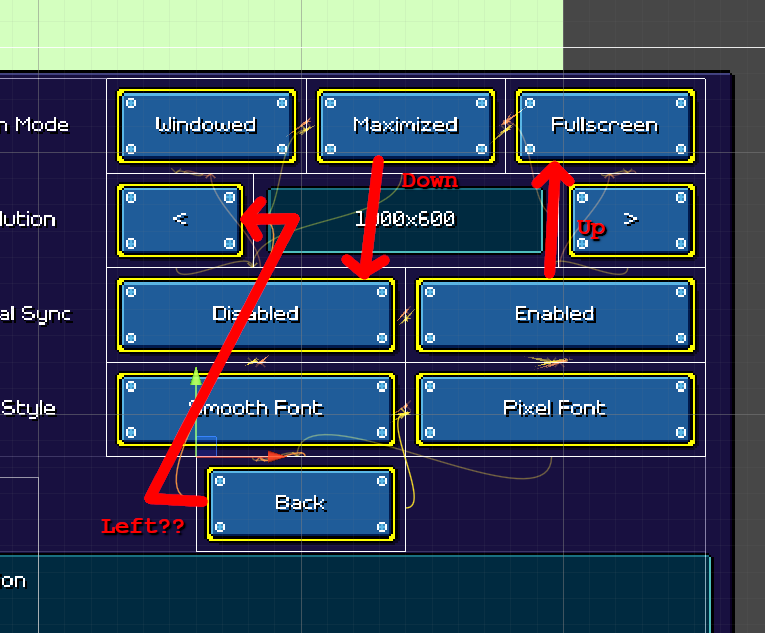
Unity allows you to manually set the left/down/up/right links for each selectable element, but as you can imagine, doing this for every single menu would be both extremely tedious and brittle (the wiring would have to be redone whenever new options are added). To make matters worse, some of these options are completely hidden based on platform-specific conditions (changing keyboard bindings doesn't make sense for a mobile device).
I needed a way to set these up automatically. I came up with a script to handle this that dynamically rewires the buttons to hook up to each other in a default way based on their position within each row. What this looks like of course heavily depends on how the UI object hierarachy is laid out, but fortunately I had a regular-enough hierarchy that this was possible to do for all of my settings menus.
Saving input rebinds
Unity's new input system is......a thing. In general I'm a bit apprehensive of just how large and complex some of Unity's new systems are growing (Addressables, Input, Package Management, ...). I understand that some of these problems (such as input handling and device management) are extremely complex by nature, so it's probably futile to try and define a simple and intuitive abstraction that just works without having to think about it. But at the same time, I think having to learn an entire set of new vocabulary (ControlScheme, DeviceLayout, ActionMap, Addressable) can feel extremely daunting, especially for someone who really wants things to "just work".
Anyways, rant aside, I'm (mostly) using the new input system for Rhythm Quest, partially because it gives more fine-tuned (non-frame-based) input timing values. Input rebinding wasn't actually AS bad to set up as I thought it would be, but I did run into a small hiccup with saving and restoring those bindings.
You see, the input system API offers some methods to save and restore binding overrides: "SaveBindingOverridesAsJson" and "LoadBindingOverridesFromJson", which work as expected. The only problem is that right now that functionality isn't in the latest stable version of the package (1.0.2) -- it's only exposed the 1.1.0-preview versions. That's all fine and good, but there was no official documentation anywhere on how a preview version of an existing stable package can be used in a project.
As far as I can tell you need to find and download the actual package on github (https://github.com/Unity-Technologies/InputSystem), uninstall the old version of the package, then manually copy the com.unity.inputsystem folder from the github repo into your project's "Packages" folder, which will cause it to be imported as an "embedded package". If you instead try to import the package via Unity's package manager (seems like the intuitive thing to do), it'll work but the package won't be copied into your project and will simply be left in its original disk location (with a hard-coded absolute path), which of course won't play nicely with source control.
Steam/Discord integration
This was really not something worth my time (soooooo far down the priority list), but sometimes you just end up working on random stuff every once in a while and eh, that's not a bad thing.
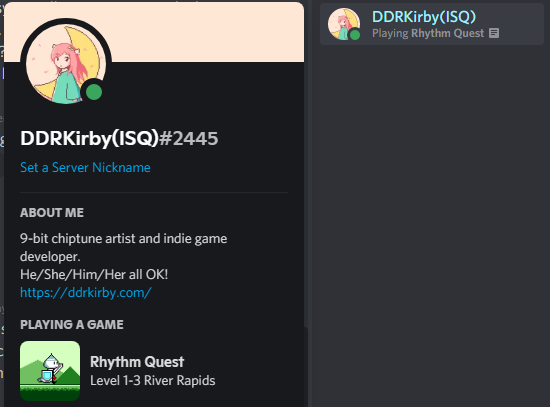
Anyways, I did a barebones integration with a Discord plugin, so now I have a fancy "Now Playing" status that even tells you the name of the current level:
I also have this working (more or less...) for Steam as well:
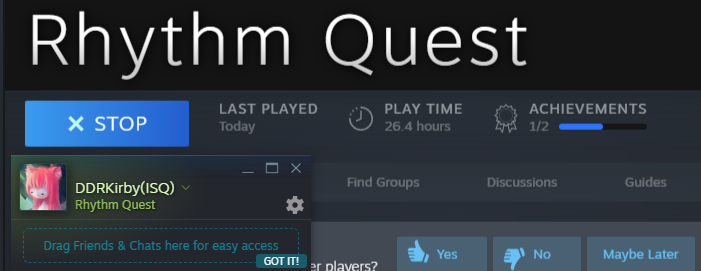
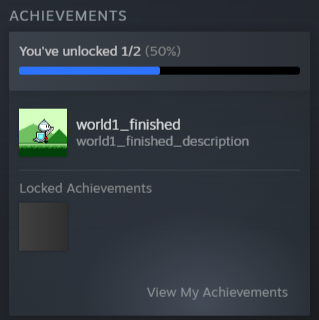
Aaaand, there's even some very rough achievement handling!
Trimming trailing audio silence
This is such a common thing, I can't believe I didn't already have a script to do this...
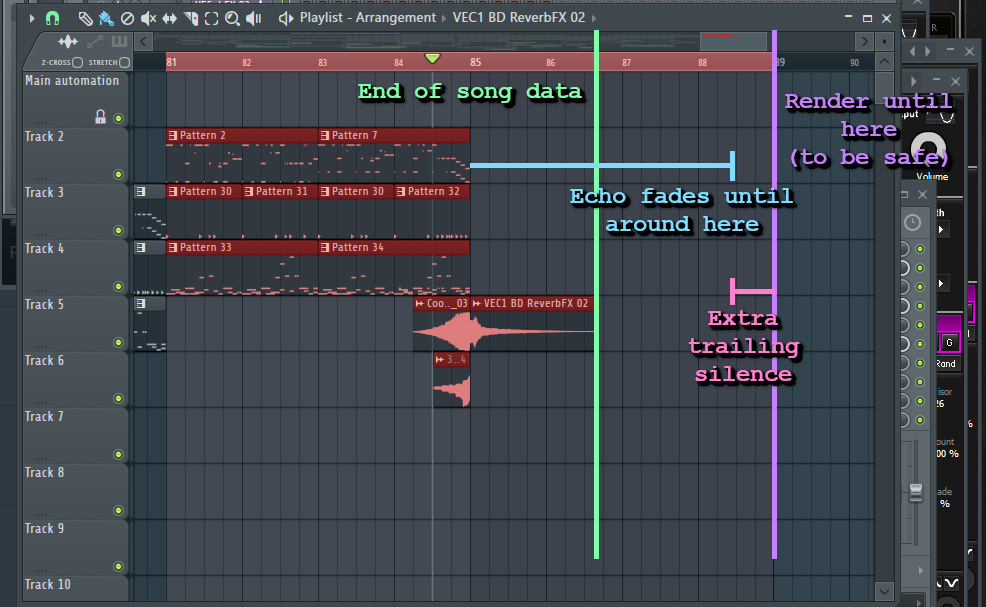
So when you export audio from music software, typically you need to deal with the issue of trailing silence. This is because when doing an audio export you generally export past the end of where the music data stops:
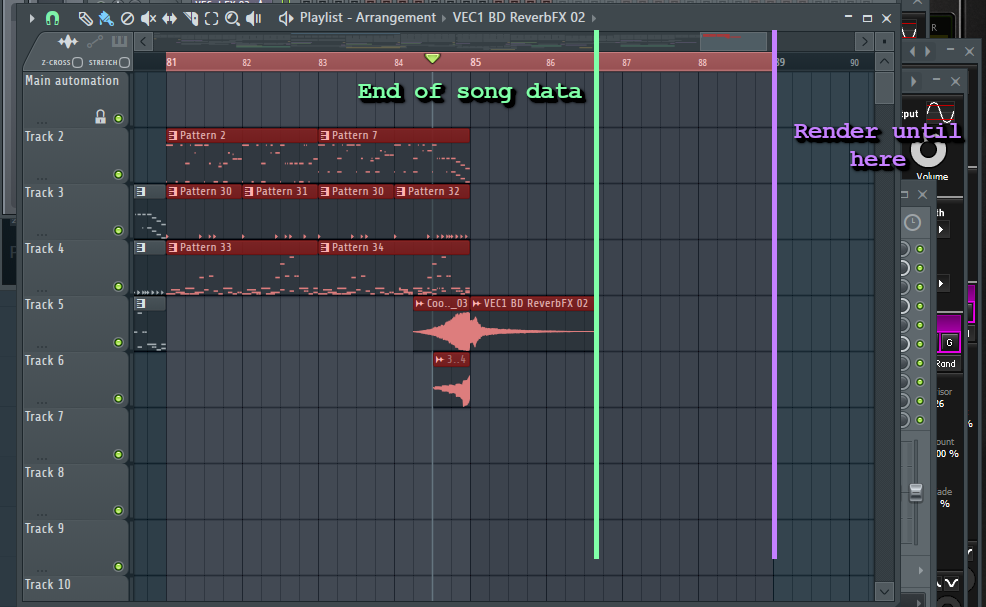
Wait, why would you do this in the first place? Well, you =could= just cut the audio off right as the music data ends, but the problem is that often there are echo and reverb effects that will trail on past that:
People have of course already thought about this problem and FL Studio actually has a mode where it attempts to automatically wait for complete silence and then cut off the audio file at that point automatically. Problem solved, right?
Well...not quite. Turns out that in the audio mastering process, we can actually use something called "dithering" to reduce (or more accurately, "improve") the artifacts that are involved when converting between different audio bit depth resolutions. This gets into jargon that's way too complicated for me to explain here, but basically the idea is that we add a bit of "fuzzy noise" to the audio signal which ends up reducing the amount of harsh artifacts. The image below [source] sort of tries to illustrate this idea:

The source image is on the left, undithered output in middle, and dithered output on the right. Notice how adding noise during the quantization process prevents "banding" artifacts despite creating an (arguably more pleasing) "fuzzy" texture.
Anyways, the point is that when we're using this sort of dithering noise (which I do), the "automatically detect complete silence" algorithm doesn't really work since we're always adding a minute level of noise (at least, this is how FL Studio tends to work from what I've experienced?). So I end up with some amount of trailing silence (not true silence, but it's literally just the dither noise) at the end of my files.
This is bad because that "silent" audio still consumes resources during playback -- it still occupies an audio playback channel (too many can cause other sounds to cut out), it still requires an audio source to play it, etc. So I now have an ffmpeg script that will simply go through all wav files in the current directory and just trim off all trailing silence up to a certain volume level (-60dB or something).
This isn't the greatest way to do this -- if you wanted to do better, you'd probably do a volume fade at the last bit instead, but I haven't bothered adding that into this script at this point. A missing volume fade that's under -60dB really isn't the biggest of my worries now.
<< Back: Devlog 10 - Latency Calibration
>> Next: Devlog 12 - User Experience Flows